Drying crop are 5-15 days in a ventilated room at a temperature of 18-22 degrees, humidity 50-60%, in the absence of light.
The place for drying should be darkened, well ventilated by fans, temperature should be a little over twenty degrees, humidity at 50-60%, use a dehumidifier if necessary. The cone will be softer to smoke if the moisture comes out of it about a week, accelerated drying will degrade the flavor and burning quality.
After drying, any variety will benefit from slow curing. Curing causes atmospheric oxygen to convert cannabinoids and terpenes into more valuable compounds. When the crop is dried to the point where a crunch can be heard when the stems are bent, it is placed in an airtight glass container. Once the oxygen inside is used up, the process stops.
The jars need to be opened and ventilated once or twice every 24 hours. If you smoke the cones immediately after drying, it is nothing compared to what you get after a good slow drying and curing. The cones should stay dry, no moisture should be released from the inner stems, they should be stored out of reach of direct light, the surrounding temperature and humidity should be comfortable for humans. I usually seal tightly and put the product in the refrigerator after three weeks, but sometimes increase the curing time to five weeks if some improvement is required. No cones should be smoked before this time.
Peeling the stalks to speed up drying
By peeling the skin off the stalks, drying time can be greatly reduced. On the first day of drying, I usually trim off all the burdock and cut the main stem with a sharp knife. Notching the stem exposes the inside of the stem to the air, reducing drying time by 20%. You can perform this ritual daily for five days until everything is completely dry.
Speed drying cones
Warning: the drying methods below are only used when the issue of time is really crucial for you. Properly dried and cured cones certainly dry better than unripe cones straight from the bush, cured by the express method. In general, the best way to smoke fresh cones is a vaporizer, but not everyone has the means and desire to buy/make this device.
Many people are familiar with the situation when the supply of ganjubas in the house suddenly came to an end, you want to smoke, and a rich crop is almost ripe in the box. If you don’t have a vaporizer, the following express drying methods will help you out of the crisis and not lose face.
Oven drying.
“It’ll do” is all I can say about this method. Well, in principle, you can smoke a dud dried in the oven. And the flavor and strength of the dud will be frankly lousy, but still the joint will smoke, and the smoke from the joint will get into your lungs. If you don’t need anything else, this simple method will work for you. The most important thing here is not to dry it out too much, because, believe me, dried out cannabis will not give you a good high.
Microwave (microwave).
If you turn on the microwave not at full power, but somewhere between 40-50%, it’s fine. However, the flavor will be crap, and the fluffiness of microwave duds loses to air-dried herbs. To avoid overdrying, try this: turn on the microwave for 5-10 seconds, then check the state of ganja, then another 5-10 seconds in the microwave and so on until ready.
Method of steam drying in microwave.
A new word in speed drying of ganjubas. An acceptable result is achieved quite quickly. Trichomes on the cones do not burst, and the flavor, although not super, but you can already smoke. In this method, the dudka is cleverly dried with the help of water vapor.
You will need:
A bowl with a lid suitable for microwave use.
Pinecones freshly cut from the bush (the pinecones should be cut into pieces – don’t chop them into shreds, just cut them into small pieces).
3 paper towels.
Microwave with power regulator.
Water.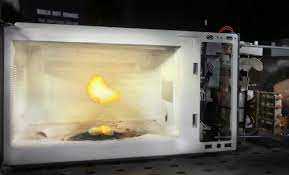
First of all, cut off 1/4 of a paper towel and lay it on the bottom of a bowl. Put the crumbled pieces in the bowl. Then take 2 paper towels, fold them several times and wet them, then wring them out well. You want the towels to be damp, but not dripping. Cover the bowl from above with the wet towels, carefully and gently. Now close the bowl tightly with the lid and leave a small gap so that the steam can escape. Now this whole construction can be put in the microwave.
The power regulator should be set somewhere between 40-50%. (I recommend 40% – I’ve dried at full power a few times and it’s been a mess.) Turn the oven on for 1 minute and you can smoke for a while. Then: take the bowl out of the microwave and wait 15-20 seconds for the steam to escape. If the towel at the bottom of the bowl (the one with the cones on it) is wet, replace it with a dry one. If the towels on top are dry, take them out, wet them, wring them out and put them back in, and don’t forget to cover everything with the lid again.
Turn on the microwave for another minute, again at 40-50%. It will take 3 to 5 turns on for the entire drying process.
This is the best way of drying if you suddenly need ganja in a hurry.
Choke drying.
Cut the cones from the bush and put them in an envelope, try to distribute the cones evenly throughout the envelope. Close the envelope and put it on the choker, and the choker should be the outer choker, the inner choker is too hot. I used to keep the cones on the choker for about 2-3 hours, with the whole time either over-drying or under-drying as I recall. Now I can say that it is still better to over-dry a little, because then you can put the cones in an airtight container, and they will suck moisture from their twigs.
For express drying, the flavor is not the worst, and it tastes pretty good.
The author’s method of drying on a grill oven.
Turn the oven on to the lowest power setting. Take the duds and shred them – all the same as in the steam drying method. Crumble the duds onto a baking tray from your oven. Then place the baking tray on the stove, exactly ON the stove, NOT inside. Stir the ganja every 5 minutes. Drying usually takes a full 20-30 minutes, but it is worth the wait. The flavor of dried ganja will not be the mildest, but the arrival is strong, masculine, and the trichomes do not crumble. I like this method of drying, I often use it myself, and I am satisfied with the results.
Drying “under the sofa”
Finally, the best way to dry, and at the same time the longest and weirdest. Take a few freshly cut cones and put them in a clean ashtray. It’s worth the hassle in the evening if you’re going to smoke in the morning. Put the doodka near any source of warm air – a computer, monitor, or any electronics with a cooling fan will do.
I personally just put the doodle under the couch – my couch is right above the vent, it’s about 85 F-degrees (30 C-degrees), and everything dries perfectly in 8 hours.
Drying in the car
Take the pinecones, put them in an envelope. Tape the envelope to the glass of your car (you need a sunny day). When it’s dry, smoke it – it’s very simple.
On a lamp with foil
How to dry dope fast? Break the cones and spread them on a piece of foil 5×5 cm. Take the foil and place it on a light bulb (not your DNAT! 60-80W will do). Turn the doodle over every 30 seconds. Drying will take 1 to 3 minutes. As a result, the cones are dry and your microwave or oven doesn’t gibber with the plan.
In a water bath
In my opinion, this is the best method for drying cones quickly.
Step 1. Take the cones from the bush, cut them into small pieces, and spread them evenly on a plate.
Step 2. Take a saucepan, fill it with water by 1/3, put it on low heat and wait for the water to boil.
Step 3. Place the plate with the dud on top of the pot. The steam from the pot will heat the plate from the bottom and the ganja will gradually dry out. The drying process of an average amount of dope takes about half an hour. When you remove the plate with the dope from the pot, be careful not to let the steam from the pot burn your hands or wet your bumps.
With absorbents
Shred the cones into small pieces and put them in a small jar. Put a few sachets of silica gel absorbent in the jar and seal the jar with a lid. The absorbent will draw the moisture out of the cones. The less air in the jar, the better the method works.
Express drying in a toaster
I have tried all of the quick drying methods listed above. The conclusions are as follows: if the method is fast, the dud is of poor quality; in other methods, the dud is fine, but it can’t be called quick drying (for me, quick drying is no more than half an hour).
I have developed a new, the most convenient, fast and gentle technology of express drying with the help of a technical product that surely everyone has – a cheerful glorious Toaster!
We turn the toaster on low heat (on my toaster it’s divisions 1-3). The point of the method is to heat the cone exactly enough so that the water evaporates and the THC remains. It would be a shame and painful if the trichomes suddenly burst, or God forbid the cones burn. That’s why low heat is just what we need.
My method uses a piece of foil about 4×4 inches (10×10 cm). We take small cones, as thick and as long as your thumb, no bigger, and place them on the foil. Be sure to make a hollow in the foil and put a dud in it and wrap it so that the foil covers the cone from the bottom, sides and partially from the top. There should be an opening at the top, otherwise the water will not evaporate. Do not press the foil too tightly to the cone, otherwise it will burn. Personally, I use the new non-stick foil, although it is already a tricky thing.
Put the foil on the toaster, so that the ledge with the bump was in the toaster at a depth of 2-2,5 cm, and the edges of the foil cling to the toaster. Secure the edges well so that the foil does not fall into the toaster.
Turn on the toaster. Let it run for a couple minutes, then it will automatically shut off and cool down. The heat from the toaster spirals will transfer to the foil and the dud will dry out little by little, and with this heat, the trichomes on the cones will not burst or burn. Wait for the toaster to cool down a bit, then turn it on again. I turn on the unit every 4-5 minutes, and after 2-3 runs I unwrap the foil and turn the duds over. After half an hour, your anasha is dried and ready to eat. The finer the cones, the faster the process goes.
For best results, increase the interval between switching on the toaster to 10 minutes, so that the heat in the foil will spread more evenly, but the drying process will take about an hour. In this case, the cone will dry more evenly (in the fast version, traces of moisture may remain inside large cones).
When using this method, up to 80-90% of twiggyness is preserved, where 100% is a normally dried (untreated) cone. The main thing here is, of course, not to over-dry or burn.
Over a gas stove.
Usually with this method I dry fresh leaves. We take fresh leaves and cut them with scissors into “dust” (we get a kind of children’s “kasha-malasha”). Light the burner. On a white sheet of paper pour raw “dust”. It is desirable to bend the edges of the sheet a little, so that nothing accidentally spilled. We place the paper sheet over the burner at a height of 10-20 cm. and for 10-15 minutes, stirring constantly, drive this sheet over the fire. Of course, the taste will be nasty, but we do not care about the taste, but the arrival.
A little tip: as you know, drying is part of the production cycle to activate the THC in the trichomes. Smoking raw dope is useless, because it doesn’t draw well and it gives you a weak high (especially if you’re already an amigo). Dry the dud at least 20-30 minutes, make sure that the bump is really dry both inside and outside. If you rush drying, you won’t make fun of people!
What to do with over-dried cones
Adding moisture to over-dried, crunchy cones is easy. All you need is an airtight container (a ziploc or liter jar works best), fresh leaves and time, about a day.
1. Put the desiccated cones in a ziploc or liter jar.
2. Add some freshly chopped leaves (fresh branches work just as well) to your jar or bag. I use 3-5 leaves per half jar. Start with a few leaves; add more if necessary. Leaves will become dry and shriveled as they give up their moisture.
3. If fresh leaves are not available, a small piece of lettuce or apple/orange/potato slice can be used just as well. A paper napkin with a few drops of water also works.
Leave the ziploc for a day. How long it takes depends on the number of cones and how dry they are. Perhaps in 5 hours you will get the results you need.
Check your container at least once a day. When the cones are ready, they will have a lovely, soft texture and will not be crunchy and brittle. They will even smell better!
P.S. If you want to moisten more cones, just take a larger amount of raw material. If you want, you can divide the cones by size.
Turn the cones over once a day to mix them up. Check for the absence of any mold. The process can take 1-3 days.